


Summatime and the livin’s easy.
And busy.
And hot.
And sunny. Super sunny.
Many photographers avoid the midday harsh light, as the shadows are short, the light is bright, and the contrast between highlight and shadow can be tricky for any lens, especially your smartphone.
Super sunny + photography + wild children is not always the best equation for perfect lighting conditions, but there are a few tricks to keep in your back pocket when you are fully immersed in the bright sun… sayyyy at the beach and your children are being so ridiculously cute.
Here are a few tips that have saved me when in bright sun before I take the picture and after I take the picture. You have a few opportunities to get it right before you bail and turn the entire image into black and white. I think pool side and beach vacations are the best time to practice.
**all images here are taken with my iPhone11 and edits can be done with any stock editing app**

**sun is behind my niece, and I have her looking up towards me so that light is on her face, but not directly in her eyes**
TIPS FOR SMARTPHONE SUCCESS IN YOUR SUNNY SUMMER LIFE:
____________________________________________________________
- Adjust image exposure before you take the picture. Did you know you could do that? Under exposing (making the photo darker), before you take your picture is huge. This is done by tapping your screen to set your focal point and simply sliding the small sun dial down.
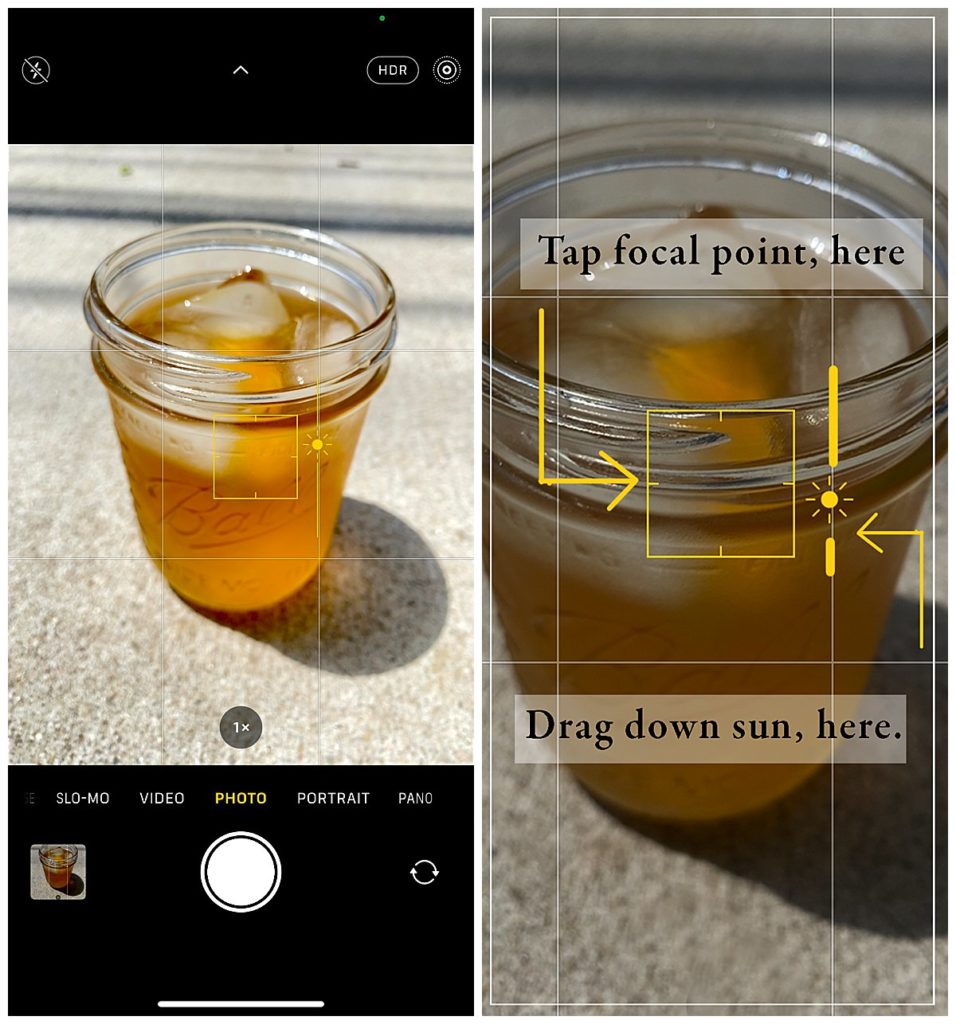
This pulls down the exposure, making the highlights less harsh and subdues the bright sun. If it feels too dark, lift the shadows in your editing panel to lighten and brighten your picture (more on that to come).
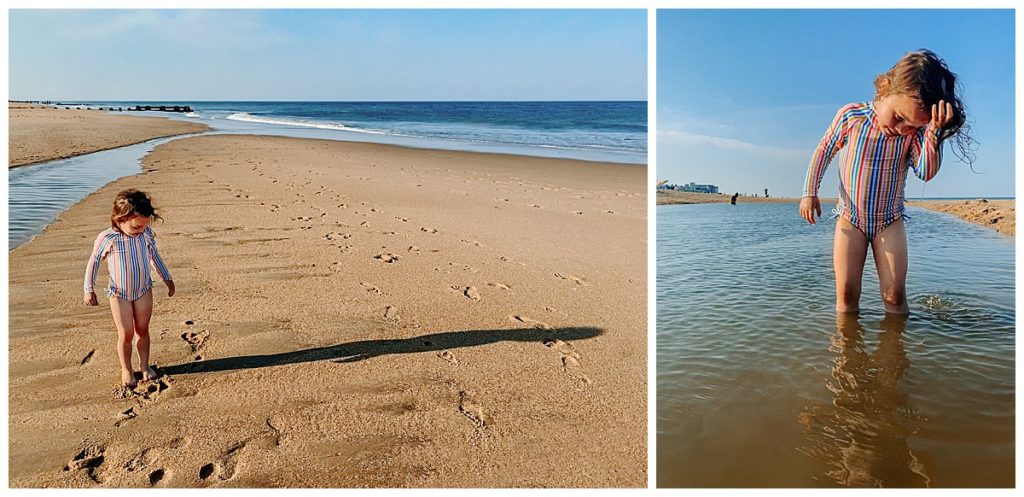
- Keep direct sun out of the frame/lens of your camera. Literally, you do not want to see that ball of fire in your picture at all, so place it to the outside of your frame by tilting your phone, or turning your baby. Below, the picture on the left, I kept the sun to the left of the phone, just out of the frame. If I had tilted my phone so the sun was visible, the quality of shadow and light in the picture would have been greatly skewed. The picture on the right, I am using side lighting to illuminate my niece, still keeping the sun out of the frame.
**If you are taking a picture of scenery or landscape it can best to have the sun to your back.**
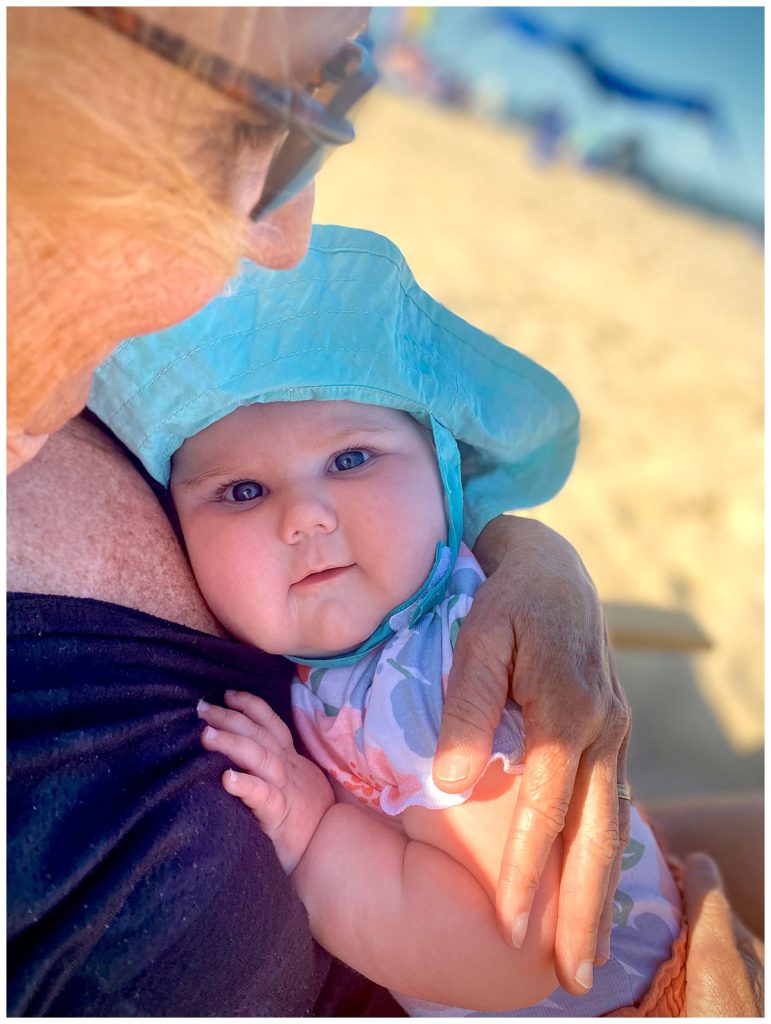
- Get your subject in the shadow of a tree, umbrella, another human, or yourself. The open shade allows sun to reflect off the sand, the water, your shirt, a blanket to help illuminate your child’s face without having them stare directly into the sun. In this image, the babies face and eyes are in the shade of her Grandmother’s body. You can see how bright the sun is on their hands, but her face rests in the shielded shade of Grandma.
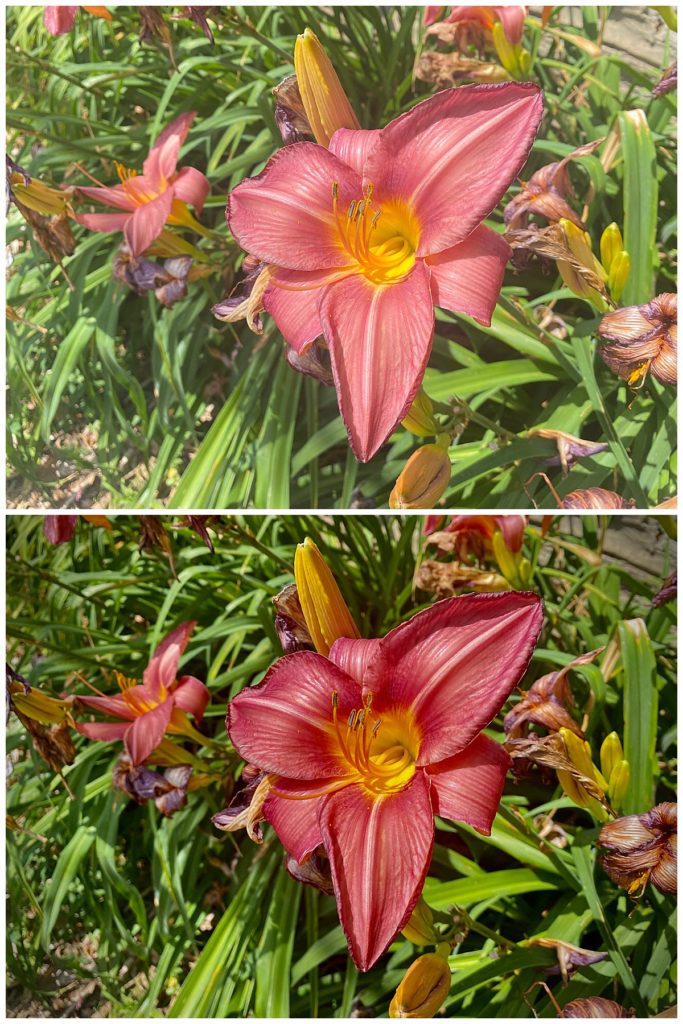
- Taking down highlights and lifting shadows in your editing panel, after you have taken an image in the bright sun. I typically add some contrast and black to add back that punch and depth. This lily was first photographed in the direct sun. I used these simple, four editing sliders to bring this flower back to life and the result is wonderful.
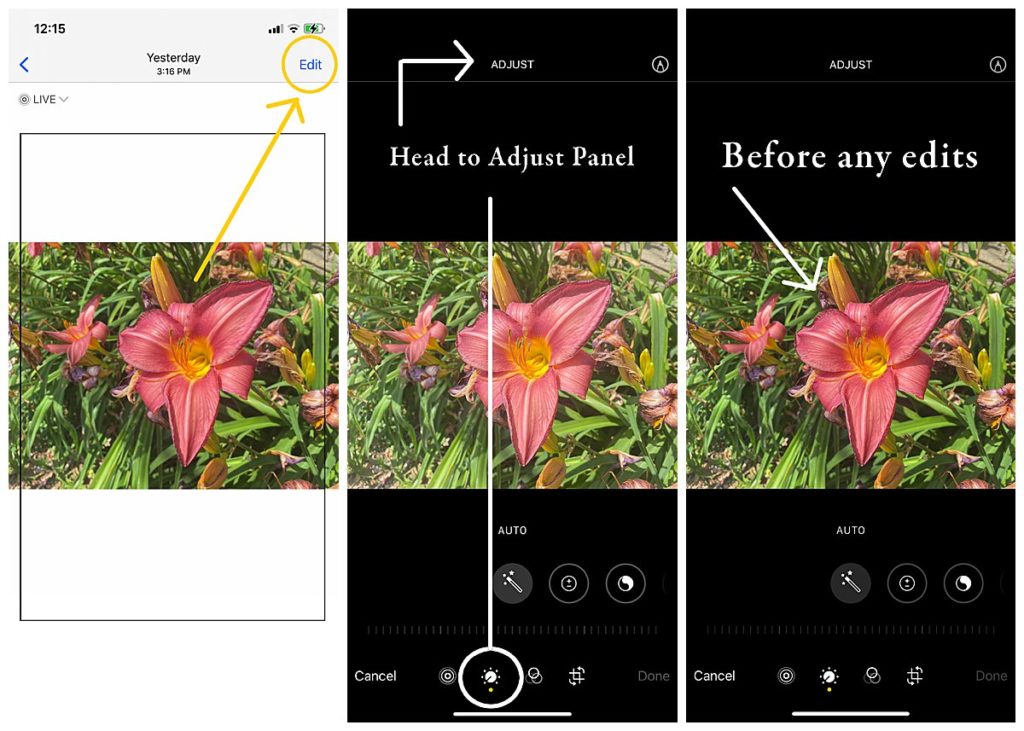
Trust the process…
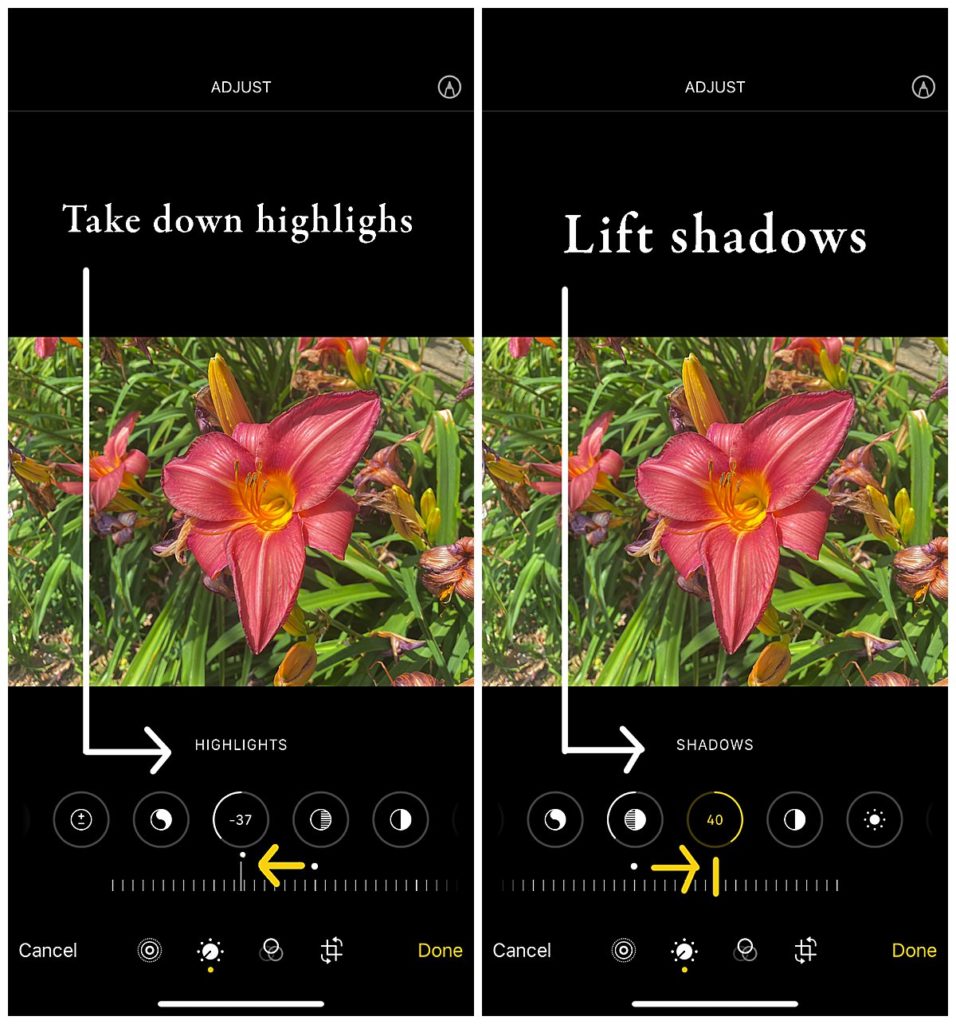
The final touches brings it back to life, I promise.
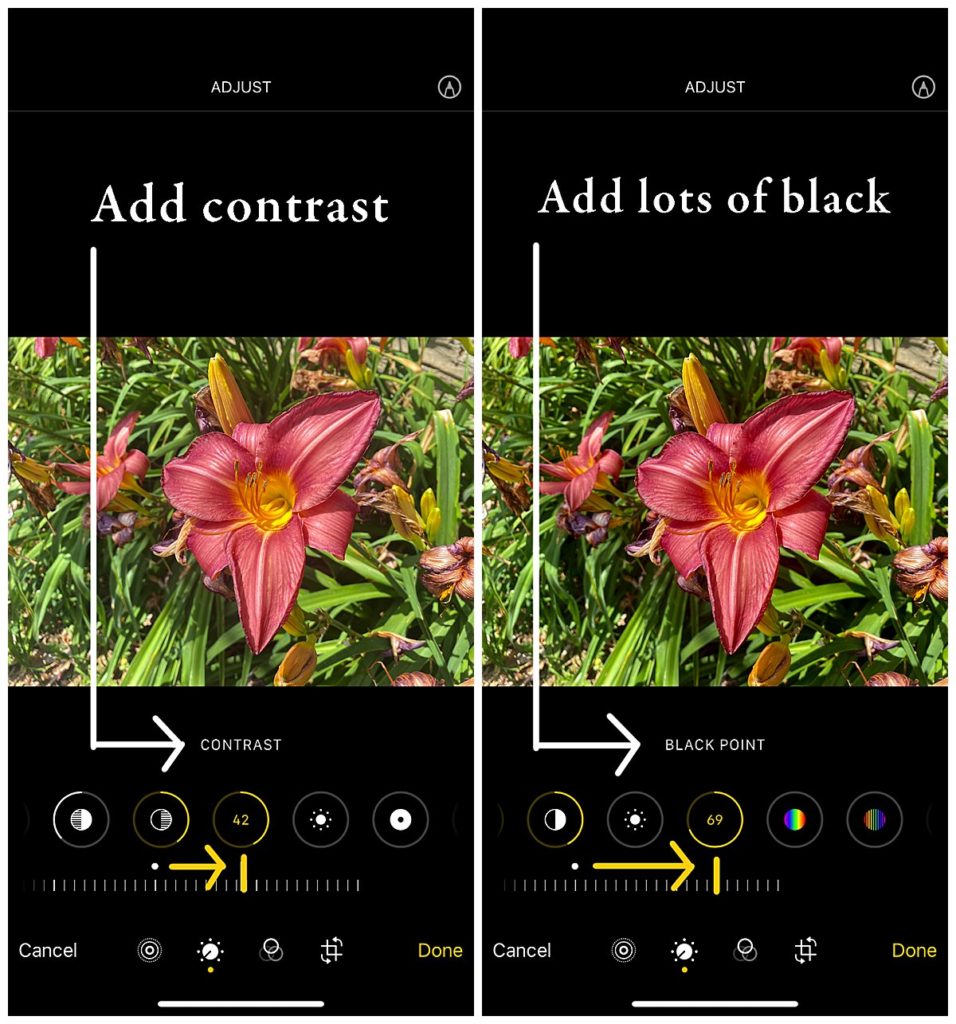
BEFORE + AFTER
_________________________________________________
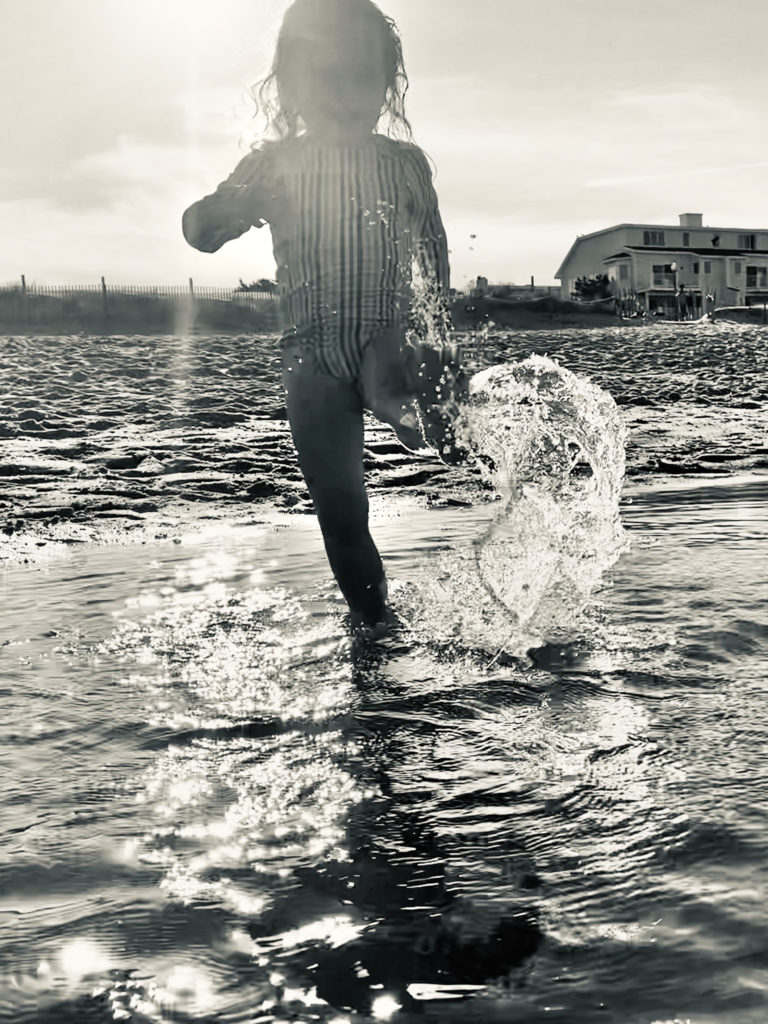
- Embrace the high contrast of light and shadow to make something dramatic by changing your image to black and white. Your phone’s inability to consistently filter bright light can lead to blown out highlights and deep, dark shadows regardless of how how many tricks you know- you always have an option of artistic flare that can save a captured moment by converting your image to black and white and just going for it.
If you have specific questions and this blog or need help editing, send me an email, steph@stephkinesphoto.com or contact through my website.


Add a comment